Dec 6
2024
Dec 6 2024
Firmware
1. Usage
Firmware is used to update the function in the menu. It is an update of the device software version.
2. Firmware Update Timing
When some functions in the menu cannot be used normally. For example, the screen brightness cannot be adjusted, the ranging function cannot be turned on, the scene mode cannot be changed, etc.
3. Acquisition method
Each device has a unique SN code, which is labeled on the model sticker on the body of the device. You can search your device’s SN code on the firmware upgrades of the download center page of our official website and get the latest firmware.
4. Update steps
1) 256 sensor resolution:Built-in EMMC (32 GB)
① Long press the power key to turn on the device.
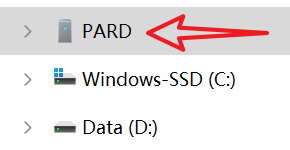
② Prepare a Type-C cable and use it to connect the device and computer.
③ The device folder will show on the computer like a USB.
④ Copy the new firmware to the device folder.(The firmware can be placed alongside the photo and video files in the device folder)
⑤ Unplug the Type-C cable, power off, and then long press the power key.
⑥ The light on the keypad will flash, indicating that the device is updating.
⑦ Once the update is finished, the device will automatically power on.
2) 480/640 sensor resolution:Micro SD Card (128GB)
① Prepare a Micro SD card and make sure it's formatted.
② Copy the firmware into the Micro SD card.
③ Insert the SD card into the device. (ensure the battery is fully charged)
④ Single press the power key.
⑤ The light on the keypad will flash, indicating that the device is updating.
⑥ Once the update is finished, the device will automatically power on.
FPGA Firmware (Thermal Imaging Device Only)
1. Usage
FPGA Firmware serves as the foundational firmware of a device, directly influencing its performance.
2. FPGA Firmware Update Timing
When the device experiences performance issues, such as response delays, image quality degradation, or occasional startup failures, etc.
3. Acquisition method
Contact the after-sales department at [email protected] for assistance.
4. Update steps
① Prepare a Micro SD card and make sure it's formatted.
② Copy the FPGA firmware into the Micro SD card.
③ Insert the SD card into the device.
④ Use a Type-C cable to connect the device to a power source.
⑤ Long press the power key to turn on the device and single press the menu key to enter the menu.
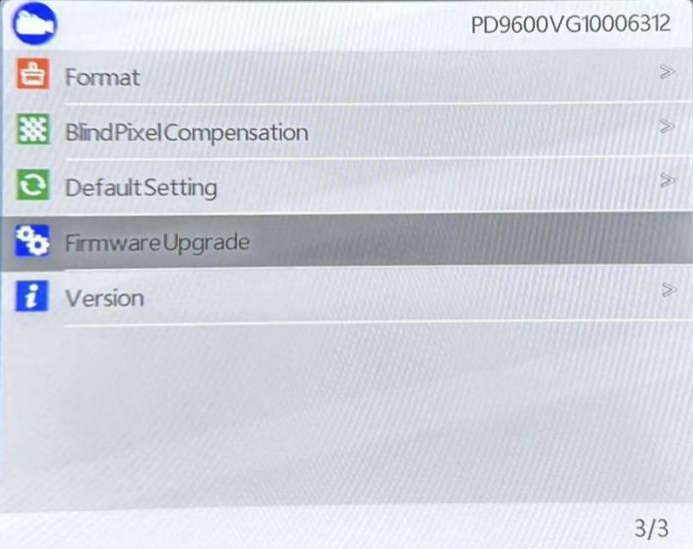
⑥ Single press the down key to move the cursor to “Firmware upgrade” and single press OK key to enter the sub-menu.
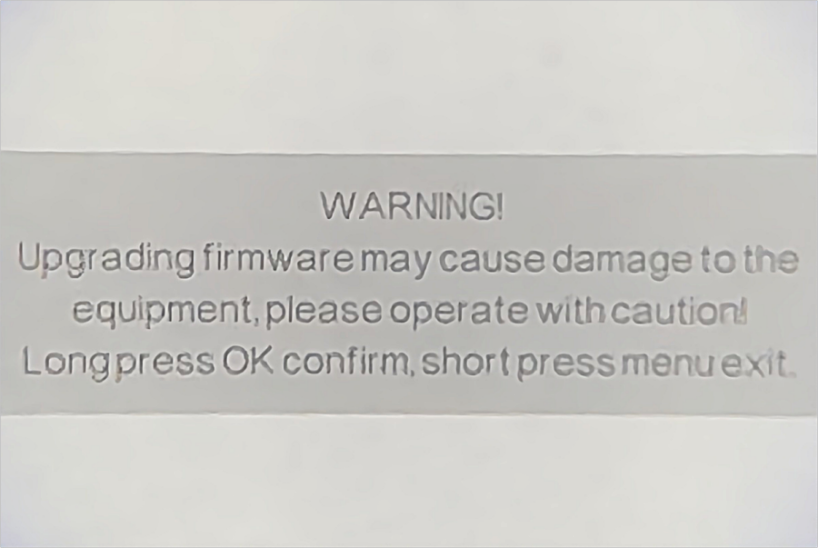
⑦ Long press OK key to confirm and start the upgrade.
⑧ The FPGA firmware will automatically upgrade. After the upgrade is complete, manually restart the device.
NIGHT VISION & THERMAL OPTICS
STAY CONNECTED
Enter Your Email Below...
Products
Powered by PARD® 2024